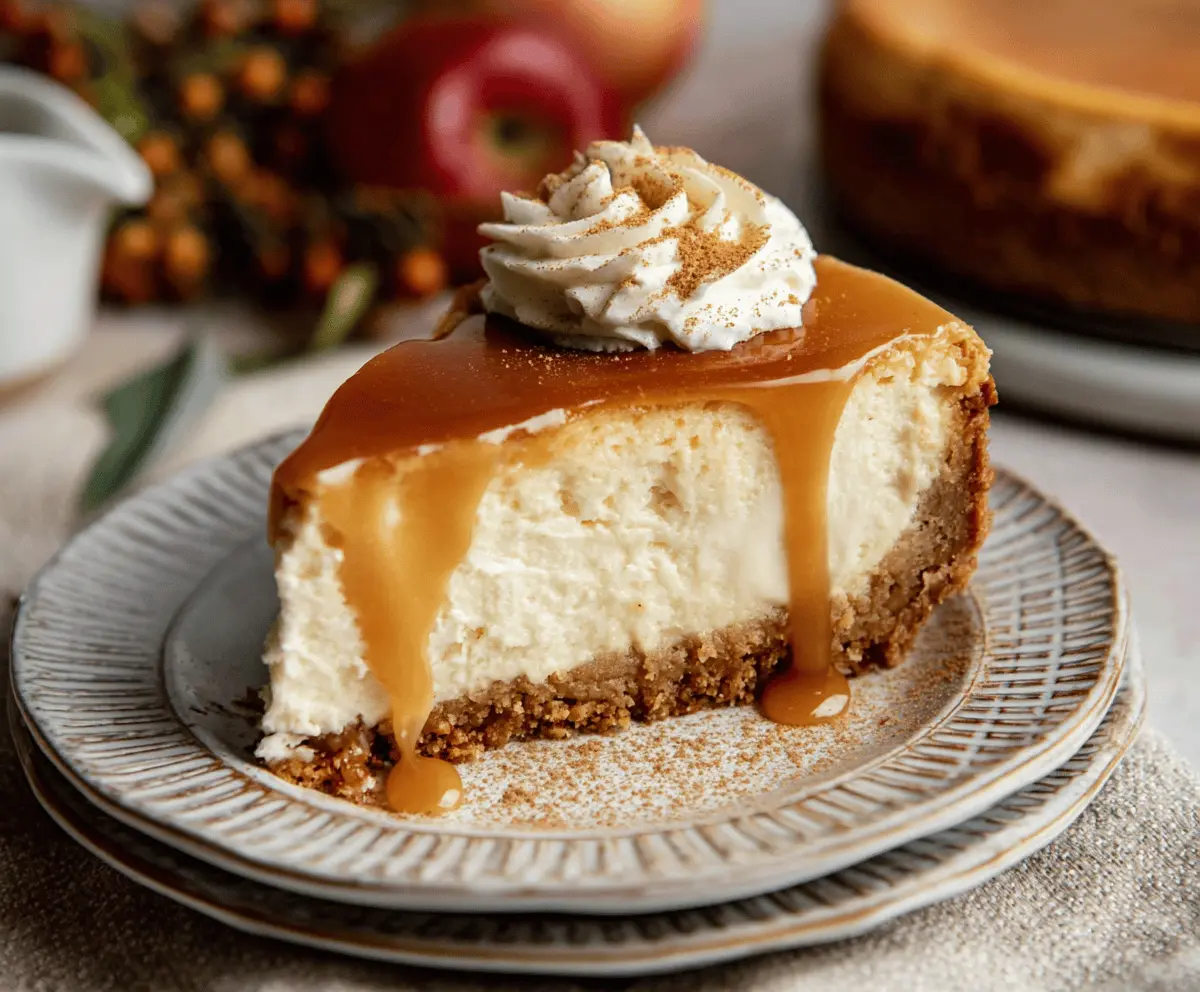
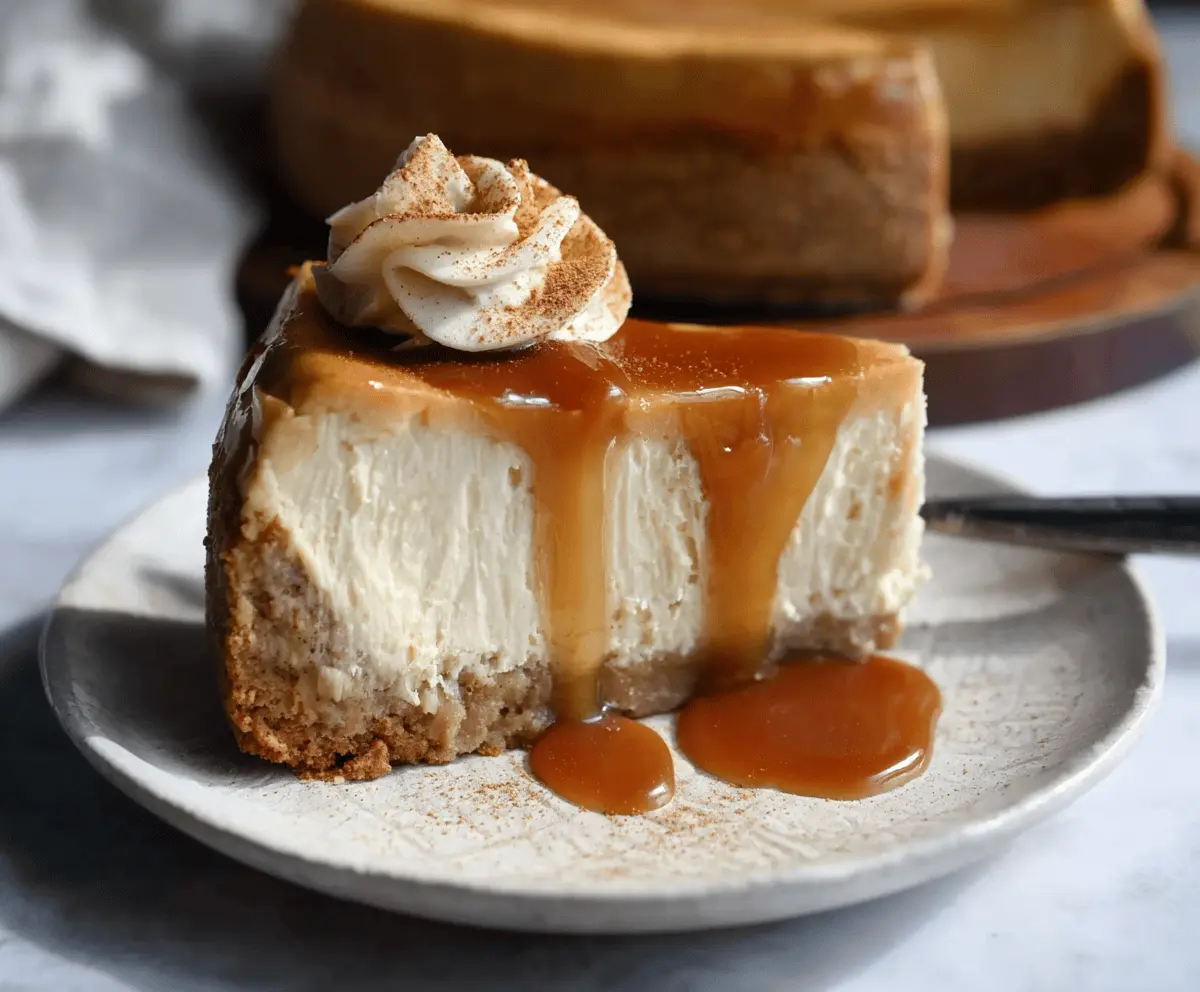
This apple cider cheesecake is a fun twist on a classic dessert! It has a creamy filling mixed with sweet apple cider and spices, all on a tasty graham cracker crust.
I adore how the spices make it feel like fall! Perfect for gatherings, it’s a treat everyone will want to try. Just remember to save some for yourself! 🍏🧀
Key Ingredients & Substitutions
Graham cracker crumbs: These give a sweet, crunchy base. If you’re gluten-free, try almond flour or gluten-free cookie crumbs. For added flavor, consider using crushed gingersnaps!
Cream cheese: This is the star of the cheesecake, providing a rich and creamy texture. You can use Neufchâtel cheese for a lighter version, or vegan cream cheese if you’re dairy-free.
Apple cider: Fresh apple cider is best for flavor. If you don’t have it, substitute with apple juice, though it won’t be as rich. You could also reduce apple juice to create a more concentrated flavor.
Spices: Cinnamon and nutmeg give warmth. Feel free to add pumpkin spice for an extra fall twist. Adjust to your taste — spice it up or keep it subtle!
How Do You Ensure a Creamy Cheesecake Without Cracks?
To achieve a smooth, creamy cheesecake, focus on these key techniques:
- Mix ingredients at low speed to avoid incorporating too much air, which can cause cracks.
- Be sure the cream cheese is fully softened to prevent lumps—let it sit out before mixing.
- Bake until the center is slightly jiggly and allow it to cool gradually in the oven. This helps prevent sudden temperature changes that can cause cracks.
- Chill the cheesecake thoroughly before serving; this helps it set perfectly!
Apple Cider Cheesecake
Ingredients You’ll Need:
For the Crust:
- 1 1/2 cups graham cracker crumbs
- 1/4 cup brown sugar, packed
- 1 teaspoon ground cinnamon
- 6 tablespoons unsalted butter, melted
For the Cheesecake Filling:
- 4 (8 oz) packages cream cheese, softened
- 1 cup granulated sugar
- 1 teaspoon vanilla extract
- 3 large eggs
- 1/4 cup apple cider
- 1/4 teaspoon ground cinnamon
- 1/8 teaspoon ground nutmeg
For the Apple Cider Caramel Sauce:
- 1 cup apple cider
- 1/2 cup light brown sugar, packed
- 3 tablespoons unsalted butter
- 1/4 cup heavy cream
- Pinch of salt
For Garnish:
- Whipped cream
- Ground cinnamon for dusting
How Much Time Will You Need?
This delicious cheesecake will take about 20 minutes to prepare and 1 hour to bake. After baking, allow it to cool for an hour and then chill in the refrigerator for at least 4 hours, or overnight for best results. Overall, you’ll need around 5 hours and 20 minutes, including chilling time.
Step-by-Step Instructions:
1. Prepare the Oven and Pan:
Preheat your oven to 325°F (163°C). Grease a 9-inch springform pan with butter or cooking spray so that the cheesecake can be easily removed later. Set the pan aside.
2. Make the Crust:
In a medium bowl, mix together the graham cracker crumbs, brown sugar, cinnamon, and melted butter until well combined. The crumb mixture should resemble wet sand.
Press the mixture firmly into the bottom of the springform pan to create an even crust. Bake for 10 minutes, then take it out of the oven and let it cool.
3. Mix the Cheesecake Filling:
In a large mixing bowl, beat the softened cream cheese with a hand mixer until it is smooth and creamy, taking about 2-3 minutes. Gradually add in the granulated sugar while continuing to beat.
Once combined, mix in the vanilla extract. Now, add the eggs one at a time, mixing on low speed after each addition until just combined.
Finally, stir in the apple cider, ground cinnamon, and nutmeg until the filling is completely smooth.
4. Bake the Cheesecake:
Pour the cheesecake filling over the cooled crust in the springform pan. Use a spatula to smooth the top.
Place the cheesecake in the oven and bake for about 50-60 minutes. It should be set but still have a slight jiggle in the center.
5. Cool Gradually:
Once baked, turn off the oven and crack the door open. Let the cheesecake sit in the oven for 1 hour to cool gradually, which helps prevent cracks.
6. Chill the Cheesecake:
After cooling, remove the cheesecake from the oven and refrigerate for at least 4 hours, or overnight for best results.
7. Make the Apple Cider Caramel Sauce:
In a saucepan over medium heat, combine the apple cider and brown sugar. Bring it to a boil, then reduce the heat and simmer, stirring occasionally until the mixture reduces by half and thickens, which should take around 15-20 minutes.
Remove from heat and stir in the butter, heavy cream, and a pinch of salt until everything is smooth. Allow it to cool slightly.
8. Serve the Cheesecake:
Once the cheesecake has chilled, run a knife around the edge of the springform pan to loosen it, then remove the ring. Place the cheesecake on a serving plate.
Drizzle the apple cider caramel sauce generously over each slice, and finish with a swirl of whipped cream and a light dusting of cinnamon for garnish.
9. Enjoy!
Slice and serve your delicious Apple Cider Cheesecake chilled. Enjoy this festive treat!
Can I Use Store-Bought Apple Cider Instead of Fresh?
Yes, store-bought apple cider works perfectly fine! Just make sure it’s a good quality cider for the best flavor. If using apple juice instead, consider reducing it on the stovetop to concentrate the flavor.
How Do I Prevent the Cheesecake from Cracking?
To prevent cracks, beat the cream cheese on low speed to avoid incorporating too much air. Also, allow the cheesecake to cool slowly in the oven with the door ajar, and chill it thoroughly in the refrigerator.
Can I Make This Cheesecake in Advance?
Absolutely! This cheesecake can be made up to 2 days ahead. Just keep it covered in the refrigerator for the best taste and freshness before serving.
How Should I Store Leftovers?
Store any leftovers in an airtight container in the refrigerator for up to 3 days. You can also freeze slices, wrapped tightly, for up to 2 months. Thaw in the fridge before serving again!