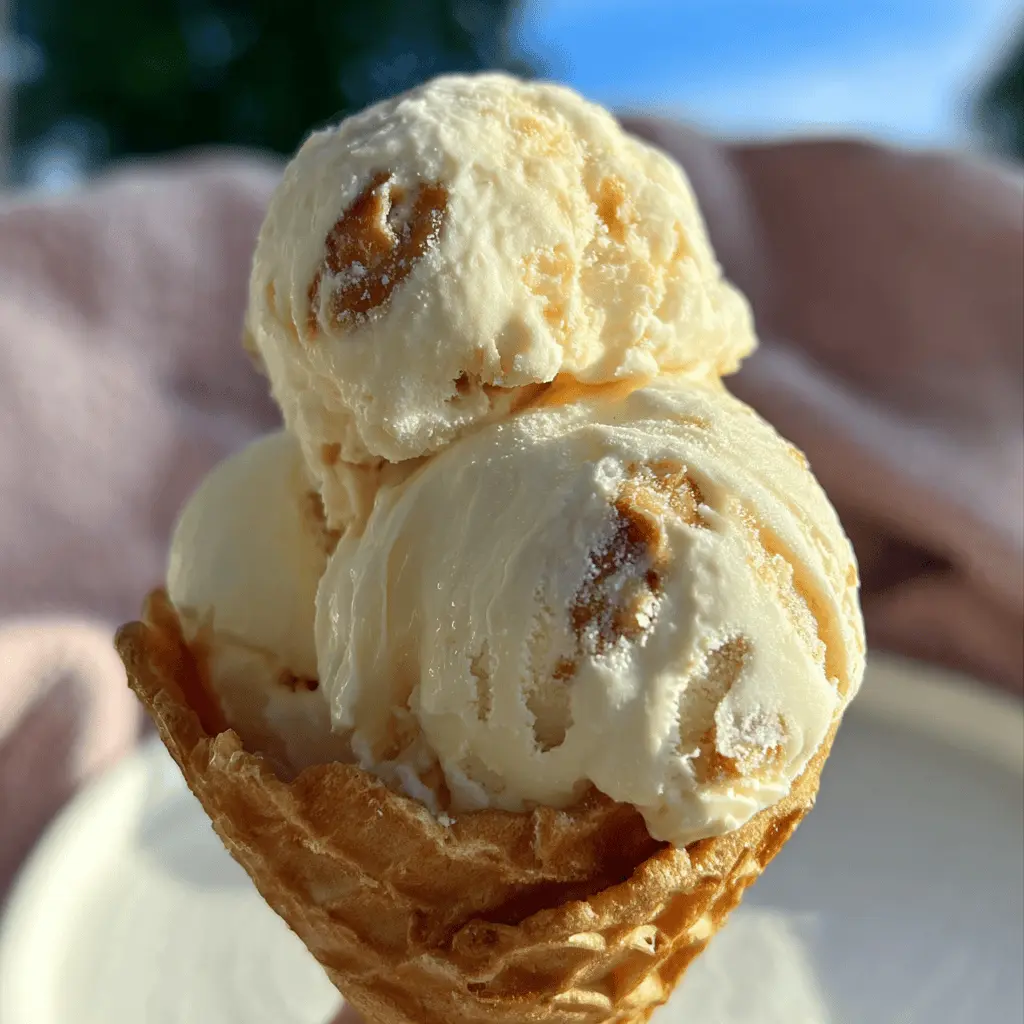
This Easy Homemade Honeycomb Ice Cream is a creamy treat that’s full of sweet honeycomb bits. It’s like a summer dream in a bowl!
Making ice cream at home is so fun! I love how the crunchy honeycomb adds a bit of surprise with every bite. Plus, it’s a perfect way to beat the heat!
Key Ingredients & Substitutions
Heavy Cream: This ingredient is so important for making the ice cream rich and creamy. If you want a lighter version, you can use half-and-half instead, but keep in mind that the final texture will be less creamy.
Whole Milk: Don’t skip this one! It helps balance the heavy cream. You can swap it with low-fat milk, but your ice cream will be less creamy and rich.
Granulated Sugar: Sugar sweetens the ice cream, giving it that delightful flavor. If you’re looking to cut down on sugar, consider using honey or maple syrup instead, but this might also change the texture a bit.
Egg Yolks: These are crucial for the custard base—they add creaminess and help thicken the ice cream. You can use a substitute like cornstarch if you want a no-egg version. Use about 2 tablespoons of cornstarch mixed with a bit of milk for this recipe.
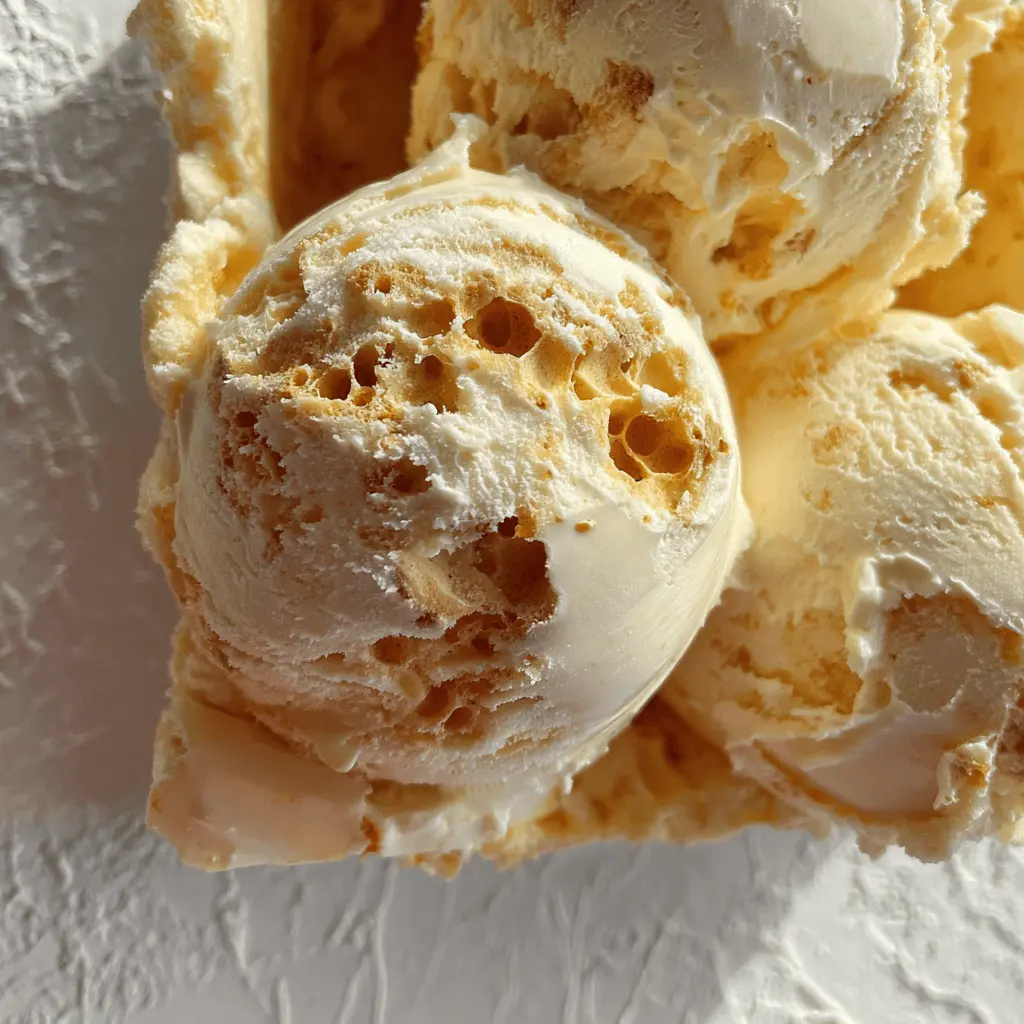
Honeycomb Candy: This is where the fun happens! You can either buy it or make it at home. If you can’t find it, feel free to use crushed toffee or chocolate-covered honeycomb for a different, yet tasty crunch.
How Do You Get the Custard Just Right?
Making the custard base may seem tricky, but it’s all about patience. When cooking the mixture, keep the heat low and stir constantly. This will help prevent the eggs from scrambling.
- Start by warming the cream and milk—not boiling—so you can add it to the egg yolks without cooking them.
- Once you combine the hot and cold mixtures, return it to the heat. Stir until thickened. This usually takes about 10 minutes.
- Look for the custard to coat the back of a wooden spoon. If you run your finger across it, the line should hold.
Taking your time with this step ensures a smooth, creamy ice cream base, which is what we all want!
Easy Homemade Honeycomb Ice Cream
Ingredients You’ll Need:
- 2 cups heavy cream
- 1 cup whole milk
- 3/4 cup granulated sugar
- 1 tablespoon pure vanilla extract
- 3 large egg yolks
- 1/2 cup honeycomb candy pieces (store-bought or homemade)
How Much Time Will You Need?
This delicious honeycomb ice cream takes about 20 minutes of active preparation time, plus 4 hours to chill the custard and another 4 hours to freeze after churning. It’s a bit of a wait, but totally worth it for that creamy goodness!
Step-by-Step Instructions:
1. Prepare the Base:
In a medium saucepan, combine the heavy cream, whole milk, and half of the granulated sugar. Heat this mixture over medium heat, stirring occasionally, until it’s just about to boil. It should be steaming but not bubbling! Once that happens, take it off the heat and set aside.
2. Whisk the Egg Yolks:
In a separate bowl, whisk together the egg yolks with the remaining sugar until the mixture becomes pale and slightly thick. This step is important for giving your ice cream that rich, creamy texture.
3. Temper the Eggs:
Now, it’s time to combine the hot cream with the egg yolks! Slowly pour the warm cream mixture into the egg yolks while whisking constantly. Doing this gently helps to gradually raise the temperature of the egg yolks without scrambling them.
4. Cook the Custard:
Pour the combined mixture back into the saucepan and return it to low heat. Stir constantly with a wooden spoon or spatula. You want to cook it until it thickens enough to coat the back of the spoon—about 170°F (77°C). Just remember, do not let it boil!
5. Cool the Mixture:
Once thickened, remove it from the heat. Stir in the vanilla extract, then strain the custard through a fine sieve into a clean bowl to catch any lumps. Let this custard cool to room temperature before covering and refrigerating for at least 4 hours—or overnight if you have the time!
6. Churn the Ice Cream:
After chilling, pour the custard into an ice cream maker and churn according to the manufacturer’s instructions until it reaches that lovely soft-serve consistency. If you don’t have an ice cream maker, you can pour it into a shallow dish and stir it every 30 minutes for a few hours to achieve a similar texture.
7. Fold in the Honeycomb:
Once churned, gently fold in the honeycomb candy pieces. This is where the magic happens—every bite will be packed with sweet, crunchy goodness!
8. Freeze to Firm Up:
Transfer your ice cream to a freezer-safe container, then pop it in the freezer for at least 4 hours—or until it’s firm. Patience will pay off, I promise!
9. Serve and Enjoy:
When it’s time to serve, scoop out the ice cream and enjoy the delightful combination of creamy base mixed with crunchy honeycomb surprises. Perfect for a hot day or just because you deserve a treat!
FAQ for Easy Homemade Honeycomb Ice Cream
Can I Use Store-Bought Honeycomb Candy?
Absolutely! Store-bought honeycomb candy is a convenient option and will save you time. Just break it into bite-sized pieces before folding it into the ice cream. You can often find it in specialty candy shops or online.
What if I Don’t Have an Ice Cream Maker?
No problem at all! You can still make this ice cream without one. Pour the custard into a shallow dish and place it in the freezer. Stir it every 30 minutes for about 2-3 hours until it’s frozen and creamy. This helps to break up any ice crystals and ensures a smooth texture!
How Long Can I Store This Ice Cream?
This honeycomb ice cream can be stored in the freezer for up to 2 weeks. To keep it fresh and creamy, make sure it’s in an airtight container. Just remember to let it sit at room temperature for a few minutes before scooping to make it easier to serve!
Can I Use Alternative Sweeteners in This Recipe?
You can use alternative sweeteners like honey or maple syrup, but note that this might affect the texture of your ice cream. If using liquid sweeteners, you may need to reduce the amount of milk slightly to maintain a creamy consistency.