This Easy Homemade Sweet Cherry Pie is a treat for your taste buds! Bursting with juicy cherries and tucked inside a flaky crust, it’s simply mouthwatering.
Making this pie feels like magic! I love letting it cool, then enjoying a slice with a scoop of vanilla ice cream. It’s the perfect sweet ending to any meal! 🍒
Key Ingredients & Substitutions
Sweet Cherries: Fresh is best if you can find them, but frozen cherries work well too—just thaw and drain excess liquid before use. If cherries aren’t available, blueberries or mixed berries can make a delicious substitute.
Sugar: The amount of sugar can vary based on the sweetness of your cherries. Start with 1 cup and adjust as needed. For a healthier version, you can use honey or maple syrup, keeping in mind that this may slightly change the pie’s consistency.
Cornstarch: This helps thicken the filling. If you don’t have cornstarch, you can swap it with flour, but you might need to increase the amount slightly since flour is less effective at thickening.
Almond Extract: While this enhances the cherry flavor, it’s optional. If you’re not a fan of almond, vanilla extract is a great alternative that complements the cherries well.
Pie Crust: Store-bought crusts save time, but homemade is always rewarding! If you’re gluten-free, there are excellent gluten-free pie crusts available at many grocery stores.
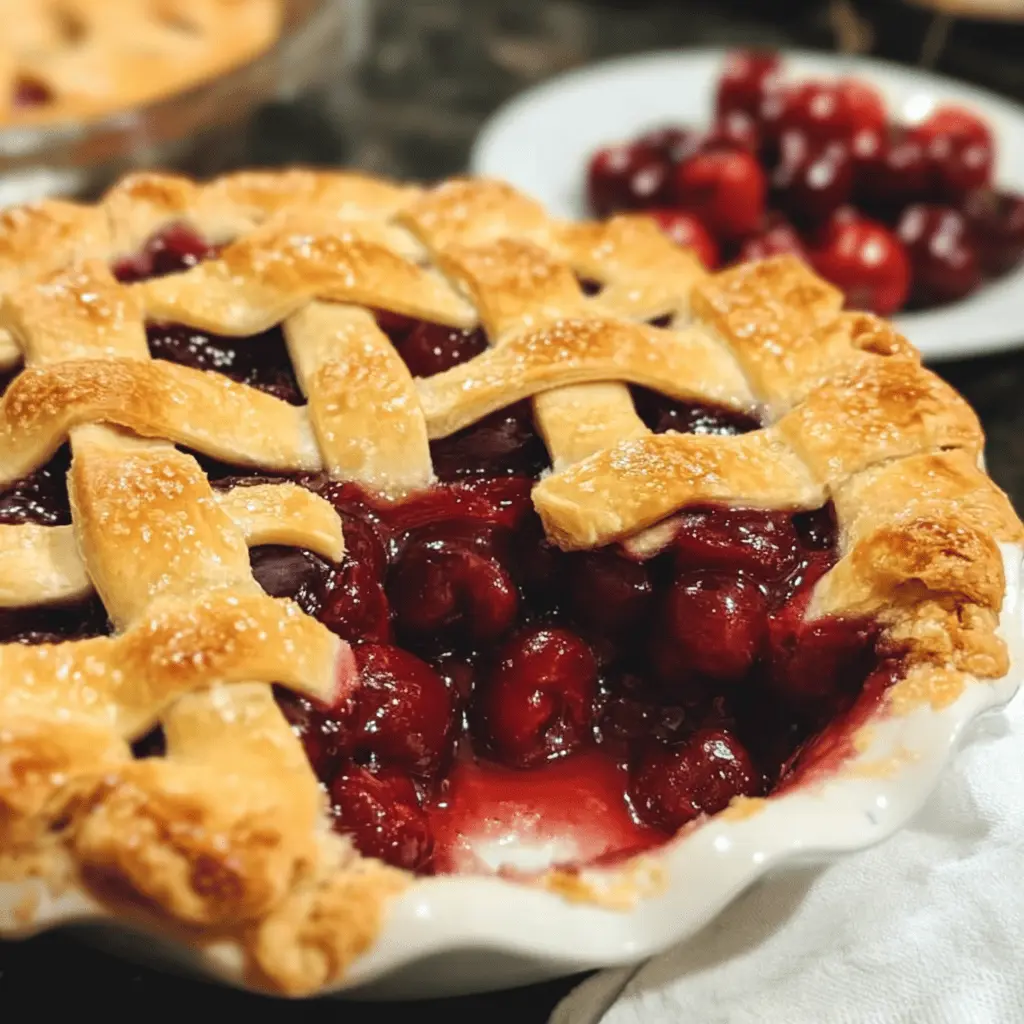
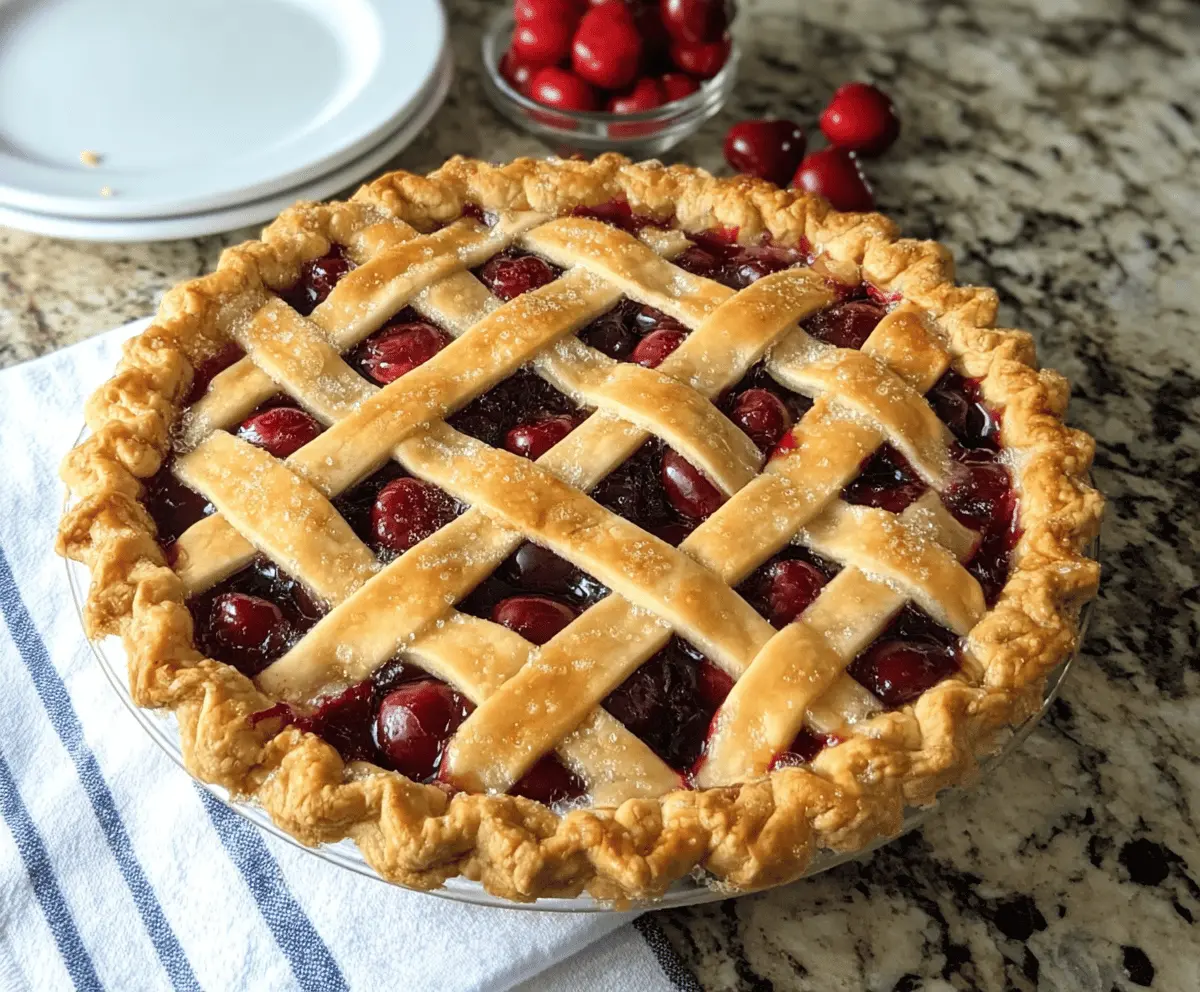
How Do I Create a Perfect Lattice Pie Crust?
Making a lattice crust can seem tricky, but it’s easier than it looks! Here’s a simple way to create that beautiful pattern:
- Roll out your second pie crust thinly and cut it into strips about ¾ inch wide.
- Lay half of the strips horizontally across the filled pie, leaving equal spaces between them.
- For the vertical strips, lift every other horizontal strip and lay a vertical strip down. Then, lay the lifted horizontal strips back down over it.
- Keep going until you’ve got a nice woven pattern. Trim any excess dough and pinch to seal!
Don’t worry about perfection; rustic looks are often the charm in homemade pies!
Easy Homemade Sweet Cherry Pie
Ingredients You’ll Need:
- 4 cups fresh or frozen pitted sweet cherries
- 1 to 1 1/2 cups granulated sugar (adjust based on cherry sweetness)
- 1/4 cup cornstarch
- 1/4 teaspoon almond extract (optional for enhanced flavor)
- 1 tablespoon lemon juice
- 1/4 teaspoon salt
- 2 tablespoons unsalted butter, cut into small pieces
- 1 package (14 oz) refrigerated pie crusts or homemade pie crust for double crust
- 1 egg (for egg wash)
- 1 tablespoon water (for egg wash)
- Coarse sugar for sprinkling (optional)
How Much Time Will You Need?
This recipe will take about 20 minutes to prep and 1 hour to bake, plus a cooling time of at least 2 hours. That makes it a total of around 3 hours before you can dig in!
Step-by-Step Instructions:
1. Preheat the Oven:
Start by preheating your oven to 425°F (220°C) to get it nice and hot for the pie.
2. Prepare the Cherry Filling:
In a large bowl, mix together the pitted cherries, sugar, cornstarch, almond extract (if you’re using it), lemon juice, and salt. Give it a gentle toss until the cherries are well coated, then let it sit for about 10 minutes. This lets the cherries release their delicious juices!
3. Assemble the Pie Crust:
Roll out one of your pie crusts and place it carefully in a 9-inch pie plate. Press it down gently to ensure it fits well in the corners.
4. Fill the Pie:
Pour the cherry filling into the pie crust, spreading it out evenly. Scatter the small pieces of butter on top of the filling for extra richness!
5. Create the Lattice Topping:
Roll out the second pie crust and cut it into strips about ¾ inch wide. Lay half the strips horizontally across the pie, then weave the remaining strips vertically over and under to create a lovely lattice pattern. Don’t worry if it’s not perfect, rustic is charming!
6. Seal the Edges:
Trim any excess dough hanging over the edges, and pinch the top and bottom crusts together to seal them. You can also make a decorative edge if you like!
7. Add an Egg Wash:
In a small bowl, beat the egg with a tablespoon of water to create an egg wash. Brush this mixture over the lattice crust to give it a beautiful golden finish.
8. Bake the Pie:
Place the pie in the oven and bake at 425°F (220°C) for 15 minutes. Then, reduce the temperature to 350°F (175°C) and bake for an additional 35-40 minutes, until the crust is golden and the filling is bubbling.
9. Cool Before Serving:
Once baked, remove the pie from the oven and let it cool on a wire rack for at least 2 hours. This cooling time helps the filling set, making it easier to slice.
10. Serve and Enjoy:
Enjoy your pie warm or at room temperature, and consider serving it with a scoop of vanilla ice cream or a dollop of whipped cream for a delightful treat!
Now, dive into your delicious, homemade sweet cherry pie with that flaky lattice crust! Enjoy every bite! 🍒🥧
FAQ for Easy Homemade Sweet Cherry Pie
Can I Use Frozen Cherries for This Recipe?
Absolutely! Frozen cherries work just as well as fresh. Just make sure to thaw them and drain any excess liquid before mixing with the other ingredients. Adjust the sugar based on sweetness since frozen cherries can be a bit more tart.
How Do I Prevent a Soggy Bottom Crust?
To avoid a soggy crust, try pre-baking the bottom crust for about 10 minutes before adding the filling. You can also sprinkle some cornstarch or flour on the crust before adding the cherries to create a barrier that helps absorb moisture.
Can I Make This Pie Ahead of Time?
Yes, you can prepare the pie and freeze it before baking. Just wrap it tightly in plastic wrap and aluminum foil. When you’re ready to bake, no need to thaw—just add a few extra minutes to the baking time!
How Should I Store Leftovers?
Store any leftover pie in the refrigerator, covered with plastic wrap or in an airtight container. It will keep well for up to 3-4 days. To reheat, just warm individual slices in the microwave or enjoy it cold!