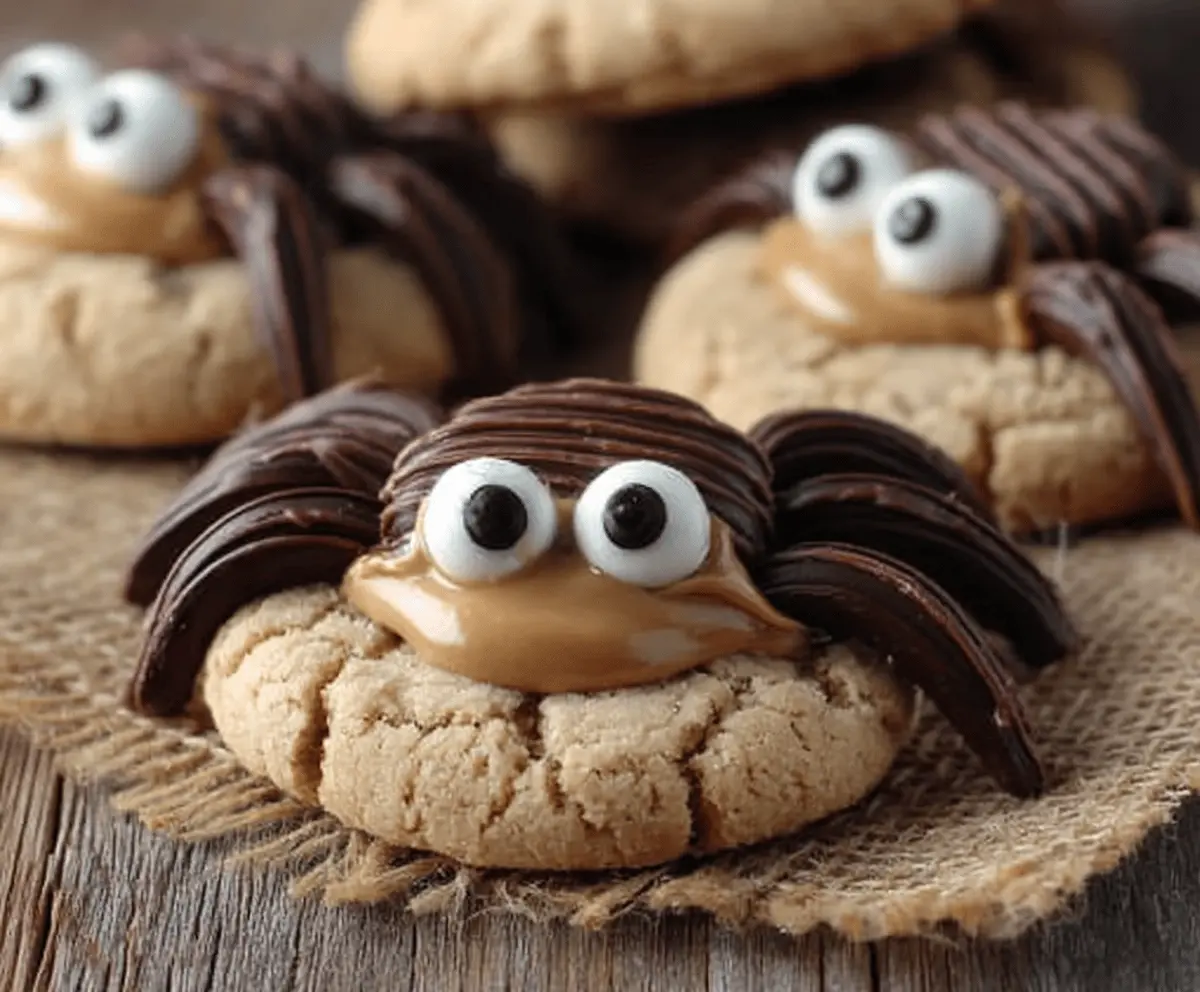
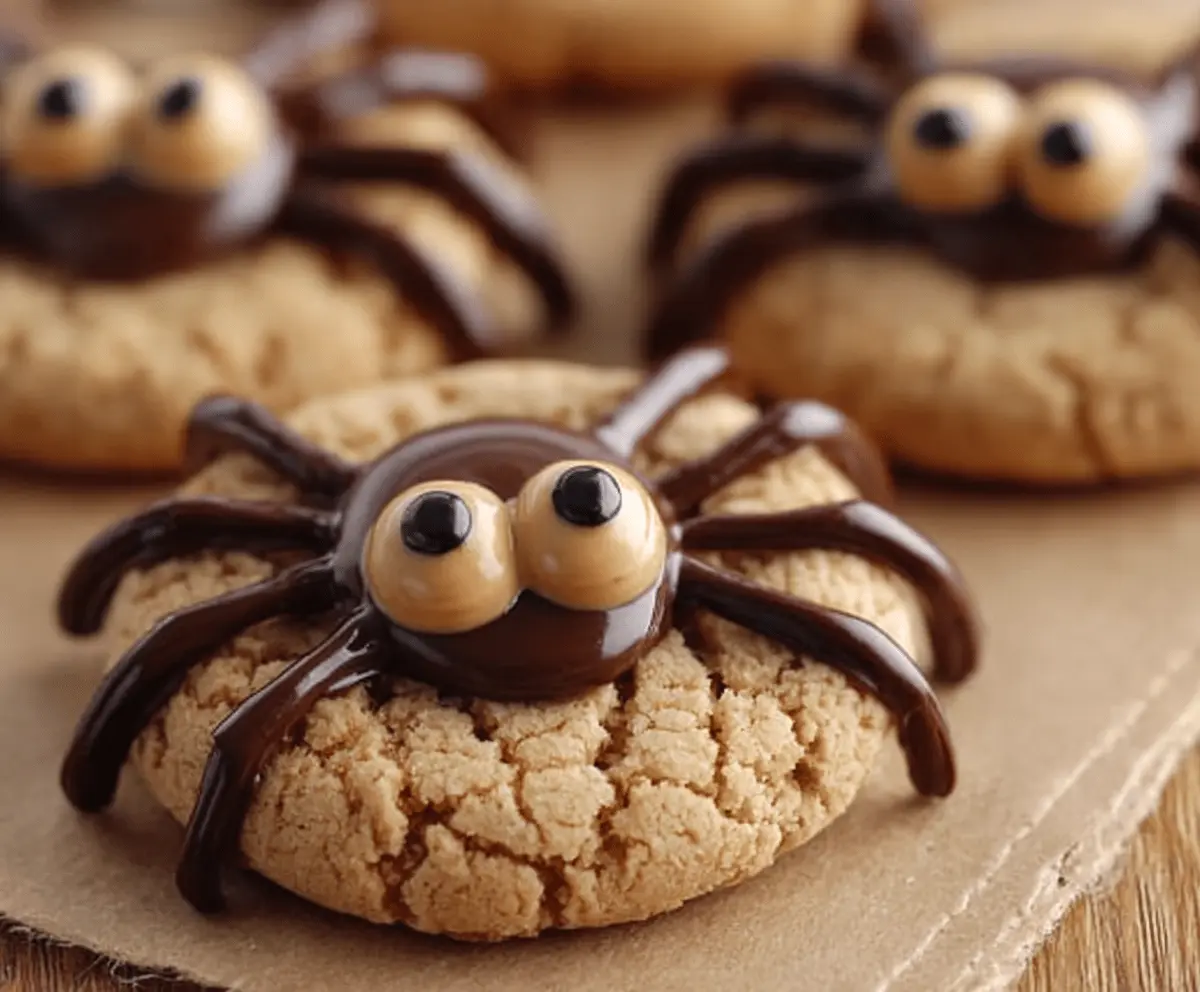
These Peanut Butter Spider Cookies are fun and tasty, perfect for a spooky treat! They are soft and chewy with a rich peanut butter flavor, topped with chocolate and candy eyes.
Baking these cookies is like making little treats for monsters! I love how easy they are to make—just mix, shape, and decorate. They’re a hit at every Halloween party! 🕷️🍪
Key Ingredients & Substitutions
Creamy Peanut Butter: This is the star of the show! You can use natural peanut butter for a healthier option, but make sure to stir it well to mix in the oils. If you’re allergic to peanuts, almond butter or sunflower seed butter works great too!
Granulated Sugar: Regular sugar keeps the cookies sweet and helps them spread. You can replace it with brown sugar for a more caramel-like flavor. If you prefer a sugar substitute, try using coconut sugar or a baking sweetener that measures like sugar.
Chocolate-Covered Pretzels: These are perfect for spider legs! If you can’t find them, regular pretzel rods dipped in melted chocolate work well. Alternatively, you can use chocolate-covered crackers.
Candy Eyeballs: Fun for decoration, candy eyeballs make your cookies more whimsical. If you can’t find them, mini chocolate chips can be used instead, or you can create eyeballs using white frosting and chocolate chips for pupils.
How Do You Achieve the Perfect Cookie Texture?
Getting the right texture for your cookies is key! Here are some tips to ensure they’re soft and chewy:
- Mix the ingredients just until combined—overmixing can make cookies tough.
- Don’t skip the chilling step after shaping the cookies. It helps them hold their shape while baking.
- Keep an eye on the baking time. Remove them once the edges are lightly browned; they’ll continue to firm up as they cool.
- Let them cool on the pan before moving to a wire rack to avoid falling apart.
By keeping these tips in mind, you’ll bake deliciously chewy Peanut Butter Spider Cookies that everyone will adore! Enjoy crafting these spooky treats!
Peanut Butter Spider Cookies
Ingredients You’ll Need:
Main Ingredients:
- 1 cup creamy peanut butter
- 1 cup granulated sugar
- 1 large egg
- 1 tsp baking soda
For the Spider Decoration:
- 12 chocolate-covered pretzel twists (for spider legs)
- 12 candy eyeballs (two per cookie)
- 1/2 cup creamy peanut butter or peanut butter frosting (for spider body)
- 1/2 cup melted chocolate or chocolate frosting (for decorating spider legs and head)
Time Needed:
This recipe takes about 15 minutes to prepare and 10 minutes to bake, plus a little time for cooling and setting the decorations. In total, you can expect about 30-40 minutes to make these delightful treats!
Step-by-Step Instructions:
1. Preheat the Oven:
Start by preheating your oven to 350°F (175°C). While the oven is warming up, line a baking sheet with parchment paper to prevent the cookies from sticking.
2. Mix the Cookie Dough:
In a medium bowl, mix together 1 cup of creamy peanut butter, 1 cup of granulated sugar, 1 large egg, and 1 tsp of baking soda. Stir well until everything is thoroughly combined and you have a smooth dough.
3. Shape the Cookies:
Roll the dough into 12 equal-sized balls and place them on the lined baking sheet. Make sure to space them about 2 inches apart, as they will spread while baking.
4. Bake the Cookies:
Bake the cookies in the preheated oven for about 10 minutes, or until the edges are lightly browned. Once baked, remove them from the oven and let them cool slightly on the baking sheet.
5. Prepare the Decorations:
While the cookies are cooling, break the chocolate-covered pretzel twists in half. These will be used as the spider legs!
6. Create the Spider Body:
Take each cookie and spread a dollop of peanut butter or peanut butter frosting in the center to create the base of the spider’s body.
7. Assemble the Eyes:
Place two candy eyeballs on the peanut butter body for the spider’s eyes. This gives your cookies a fun, spooky look!
8. Add the Spider Legs:
Now, insert 3 pretzel halves on each side of the peanut butter body to form the spider legs. Adjust them as needed to make sure they look just right!
9. Decorate with Chocolate:
Drizzle the melted chocolate or chocolate frosting over the peanut butter body and legs. This adds to the creepy appearance of your spider cookies.
10. Let Them Set:
Allow the cookies to sit until the chocolate sets. If you’re in a hurry, feel free to pop them in the fridge for faster setting!
11. Serve and Enjoy:
Once the chocolate is set, your Peanut Butter Spider Cookies are ready to enjoy! Serve them at a party or share with friends for a fun treat.
Happy baking! These cute cookies are not only fun to make but taste delicious too! Perfect for Halloween or any playful occasion!
Can I Use Natural Peanut Butter Instead of Creamy Peanut Butter?
Yes, natural peanut butter works well! Just make sure to stir it thoroughly before measuring since the oils can separate. This may create a slightly different texture, but the flavor will still be delicious!
How Should I Store Leftover Spider Cookies?
Store any leftover cookies in an airtight container at room temperature for up to 4 days. If you want to keep them fresh for longer, you can refrigerate them for up to a week. Just let them come to room temperature before serving.
What Can I Use Instead of Chocolate-Covered Pretzels?
If you can’t find chocolate-covered pretzels, feel free to use regular pretzel rods dipped in melted chocolate or chocolate-covered crackers. Both options work great for creating those spooky spider legs!
Can I Make These Cookies Gluten-Free?
Absolutely! Substitute the standard granulated sugar with a gluten-free baking mix that measures like regular sugar. Just check the other ingredients to ensure they are gluten-free as well. Enjoy your spooky treats worry-free!