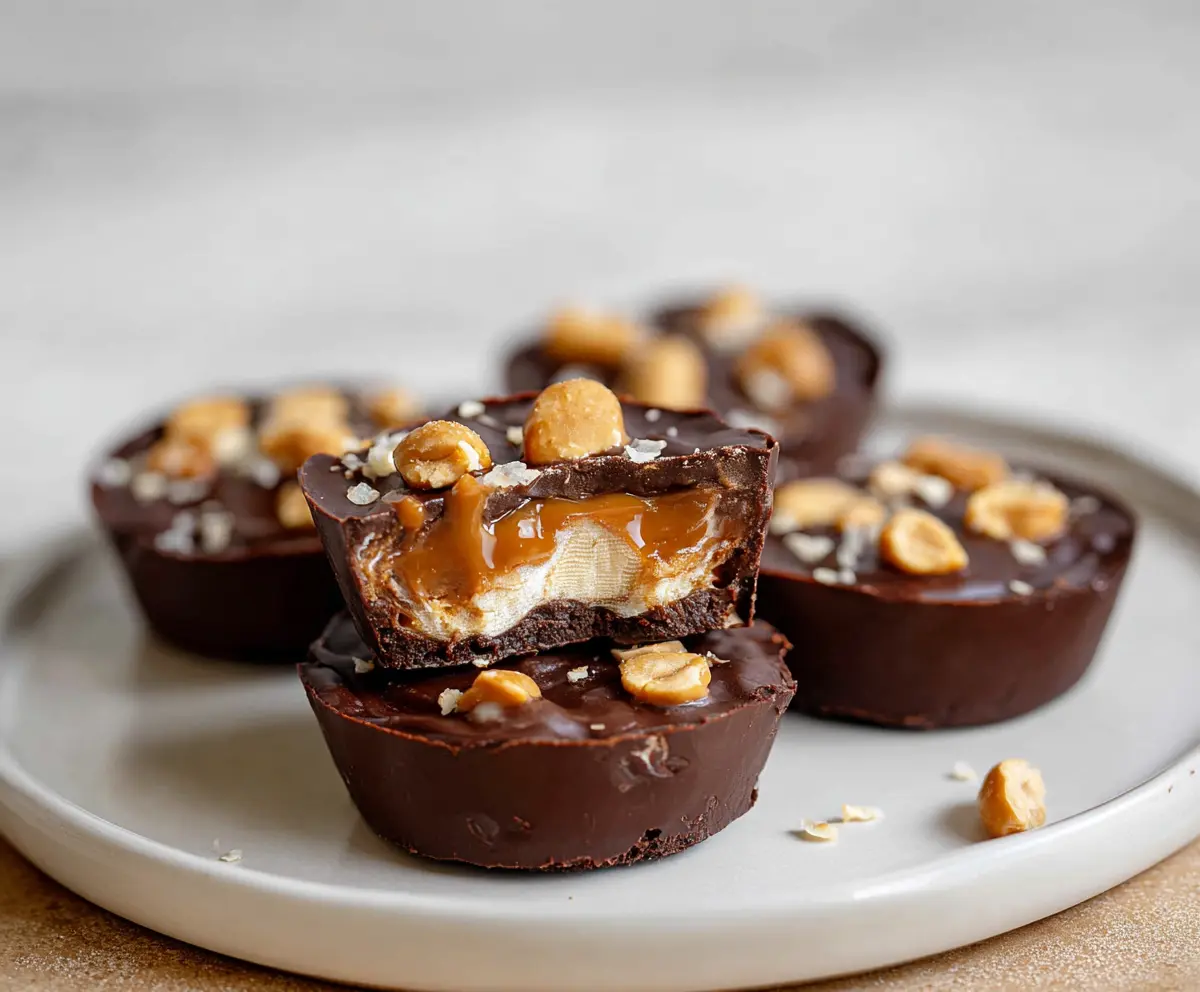
These Snickers Cups are a fun treat that taste just like the classic candy bar! With a creamy chocolate layer, crunchy peanuts, and gooey caramel, they are sure to please!
Making these cups makes me feel like a kid again, especially when I sneak a few before they even chill! They are perfect for sharing or just enjoying all by yourself! 😋
Ingredients & Substitutions
Chocolate Chips: Dark or semi-sweet chocolate chips bring a rich flavor to the cups. If you’re a milk chocolate fan, feel free to swap! Look for chocolate melting wafers for easy melting, too.
Mini Marshmallows: These are a fun nod to nougat. If you have a marshmallow fluff or another kind of soft candy, you can use that for a similar texture.
Caramel Sauce: Pre-made caramel sauce saves time, but if you want homemade, you can cook sugar and cream together for a rich flavor. Soft caramel candies are a great substitute too!
Roasted Peanuts: Crunchy and salty, they add a nice texture. For a nut-free option, try sunflower seeds or pumpkin seeds, just as crunchy!
Sea Salt Flakes: A sprinkle of salt balances the sweetness. If you don’t have sea salt, regular salt will work fine; just use less!
How Can I Get the Chocolate Shell Just Right?
Making the chocolate shell is important for that perfect Snickers Cup experience. Here’s a simple way to ensure it’s just right:
- Melt the chocolate slowly in the microwave, stirring often so it doesn’t burn.
- Spread the melted chocolate evenly in the muffin cups. Make sure it goes up the sides for a good shell.
- Don’t rush! Freeze the cups long enough for the chocolate to fully set before adding the fillings.
This careful approach ensures a sturdy shell that holds all the delicious layers inside. Enjoy making these treats!

How to Make Snickers Cups
Ingredients You’ll Need:
For the Cups:
- 2 cups dark or semi-sweet chocolate chips (or chocolate melting wafers)
- 1 cup mini marshmallows
- 1 cup caramel sauce or soft caramel candies
- 1 cup roasted peanuts, roughly chopped (plus extra for topping)
- Sea salt flakes (optional, for sprinkling on top)
How Much Time Will You Need?
This fun treat will take about 20 minutes of active preparation time, plus an additional 40 minutes for chilling. You’ll spend the first part melting, mixing, and filling your muffin tin, and then just let those delicious cups set in the freezer or fridge!
Step-by-Step Instructions:
1. Prepare Your Muffin Tin:
Start by lining a muffin tin with paper liners or lightly greasing each cup. This will help you easily remove your Snickers Cups once they’re set. If you don’t have liners, a good spray of cooking oil works wonders too!
2. Melt the Chocolate:
In a microwave-safe bowl, add the chocolate chips. Heat them in the microwave in 30-second intervals, stirring well after each interval until they are smooth and melted. Be patient—this is crucial for a nice, even chocolate layer!
3. Create the Chocolate Shell:
Using a spoon, scoop about 1 tablespoon of the melted chocolate into the bottom of each muffin cup. Use the back of the spoon to spread it evenly up the sides, creating a shell. This step is where all the delicious fillings will sit!
4. Set the Chocolate Shell:
Pop the muffin tin in the freezer for about 10 minutes. This will help the chocolate shell harden and keep your cups sturdy.
5. Add the Marshmallows:
Once the chocolate is set, take the muffin tin out of the freezer. Place a few mini marshmallows into each chocolate shell. These marshmallows act as the nougat layer for your Snickers Cups!
6. Pour on the Caramel:
Next, drizzle a small amount of caramel sauce (or place small pieces of soft caramel) over the marshmallows in each cup. Be generous, this is where the gooey goodness comes from!
7. Top with Peanuts:
Sprinkle some of the chopped roasted peanuts over the caramel layer. Make sure to get nice coverage for that crunchy texture reminiscent of the classic candy.
8. Complete with More Chocolate:
Pour another tablespoon of the melted chocolate on top of the fillings to cover everything completely. This seals in all the delicious layers.
9. Add Finishing Touches:
While the chocolate is still soft, sprinkle a pinch of sea salt flakes and a few extra peanuts on top. This little touch adds an amazing flavor contrast!
10. Chill to Set:
Return the muffin tin to the freezer or refrigerator for about 30 minutes or until the chocolate is completely set. This waiting time will create that perfect firm structure.
11. Remove and Serve:
Once set, carefully take the Snickers Cups out of the muffin tin and remove the paper liners. If they stick a little, you can gently coax them out with a knife.
12. Enjoy or Store:
These delightful treats are ready to enjoy immediately! If you’re not eating them right away, store the Snickers Cups in an airtight container in the refrigerator. They’ll stay delicious for several days!
Enjoy your homemade Snickers Cups—a rich and satisfying treat that’s sure to bring a smile! 🍫🥜
Can I Use Different Types of Chocolate?
Absolutely! While dark or semi-sweet chocolate is recommended for a rich flavor, you can use milk chocolate if you prefer a sweeter taste. White chocolate can also be used for a different twist, but it will change the flavor profile of the cups.
How Long Do These Snickers Cups Last?
Homemade Snickers Cups can be stored in an airtight container in the refrigerator for up to a week. They also freeze well, so if you want to enjoy them later, you can store them in the freezer for a month. Just remember to thaw them in the fridge before enjoying!
Can I Make Them Nut-Free?
Definitely! If you’re looking to make these treats nut-free, simply omit the peanuts and use seeds like sunflower or pumpkin seeds for that crunch. You could also include puffed rice or quinoa for texture without the nuts.
What If My Chocolate Hardens Before I Finish?
If your melted chocolate starts to harden while you’re working, you can gently reheat it in the microwave for a few seconds at a time, stirring well after each interval until it’s melted again. This will make it easy to work with!