This fun and tasty Easter Dirt Cake looks like a spring garden! With layers of chocolate pudding, crushed cookies, and gummy worms, it’s perfect for kids and adults alike.
Every time I make this cake, I can’t help but smile at the cute worms peeking out. It’s the sweetest mess! Serve it at your gathering, and watch everyone dig in with delight! 🐍💚
Ingredients & Substitutions
Oreo Cookies: These are the star of the crust! If you can’t find Oreos, any chocolate sandwich cookies will work well as a substitute. Just make sure they have a similar texture and taste.
Cream Cheese: Use full-fat cream cheese for a richer taste. If you prefer a lighter option, Neufchâtel cheese is a great substitute, providing a similar texture with less fat.
Instant Chocolate Pudding: Don’t have chocolate pudding mix? Vanilla pudding works in a pinch—just add a little cocoa powder for that chocolate flavor, or use homemade pudding if you have a recipe handy.
Whipped Topping: You can swap this out for homemade whipped cream if you’d like a fresh touch. Just whip heavy cream with a bit of sugar until soft peaks form.
Food Coloring: Pink food coloring is optional. You can omit it or use natural colorings made from beet juice for a healthier alternative!
How Do You Create a Perfect Oreo Crust?
The Oreo crust is the foundation of the Easter Dirt Cake, so getting it right is important. It’s pretty easy when you follow these simple steps!
- Start by crushing the Oreos. A food processor makes quick work of it, but a sealed plastic bag and rolling pin work just as well for a little workout!
- Mix the crushed cookies with melted butter. This helps the crumbs stick together. The mixture should feel like wet sand when it’s ready.
- Pressure is key! Press the mixture firmly into your dish to form a solid base. This will help it hold together when you add the layers above. Don’t skimp on this step!
How to Make an Easter Dirt Cake
Ingredients You’ll Need:
For the Crust:
- 36 Oreo cookies (about 3 cups crushed)
- 1/4 cup unsalted butter, melted
For the Cream Cheese Layer:
- 1 (8 oz) package cream cheese, softened
- 1/4 cup granulated sugar
For the Pudding Layer:
- 2 cups cold milk
- 1 (4-serving) package instant chocolate pudding mix
For the Topping:
- 1 (8 oz) tub whipped topping, divided
- Pink food coloring (optional, for the pink layer)
- Assorted pastel Easter candy eggs (like candy-coated chocolate eggs)
- White chocolate bunny or similar Easter-themed decoration
- Mini chocolate chips (for bunny eyes and mouth)
How Much Time Will You Need?
This delightful Easter Dirt Cake takes about 20 minutes of preparation time plus at least 3-4 hours to chill in the refrigerator (or overnight for best results). It’s perfect for making ahead and just letting it set while you enjoy your day!
Step-by-Step Instructions:
1. Prepare the Oreo Crust:
Start by crushing the Oreo cookies finely. You can use a food processor for quick work or put them in a sealed bag and smash them with a rolling pin. Save about 1/2 cup of the crushed Oreos for topping later. In a bowl, mix the remaining crushed Oreos with the melted butter until it’s all evenly combined.
2. Form the Base Layer:
Press the Oreo and butter mixture firmly into an 8×8 inch square serving dish (or any similar size) to create a solid and even crust, making sure it’s packed tightly.
3. Make the Cream Cheese Mixture:
In a medium bowl, use a mixer to beat the softened cream cheese and granulated sugar until the mixture is light and fluffy. This really adds a delicious creaminess!
4. Prepare the Chocolate Pudding Layer:
In a separate large bowl, whisk together the instant chocolate pudding mix and cold milk. Keep whisking for about 2 minutes until it thickens to a pudding consistency.
5. Combine the Cream Cheese and Pudding:
Gently fold the fluffy cream cheese mixture into the thickened chocolate pudding until everything is combined smoothly.
6. Add the Whipped Topping:
Next, fold in 3/4 of the tub of whipped topping into your chocolate pudding-cream cheese mixture until it’s all mixed well and looks delicious!
7. Layer the Chocolate Mousse:
Spread the chocolate mousse mixture evenly over the Oreo crust. It’s going to be rich and oh-so-delicious!
8. Prepare the Pink Layer:
In a small bowl, mix the remaining whipped topping with a few drops of pink food coloring, stirring until you achieve a nice light pink color.
9. Add the Pink Whipped Layer:
Carefully spread the pink whipped topping over the chocolate mousse layer, giving it a lovely soft look.
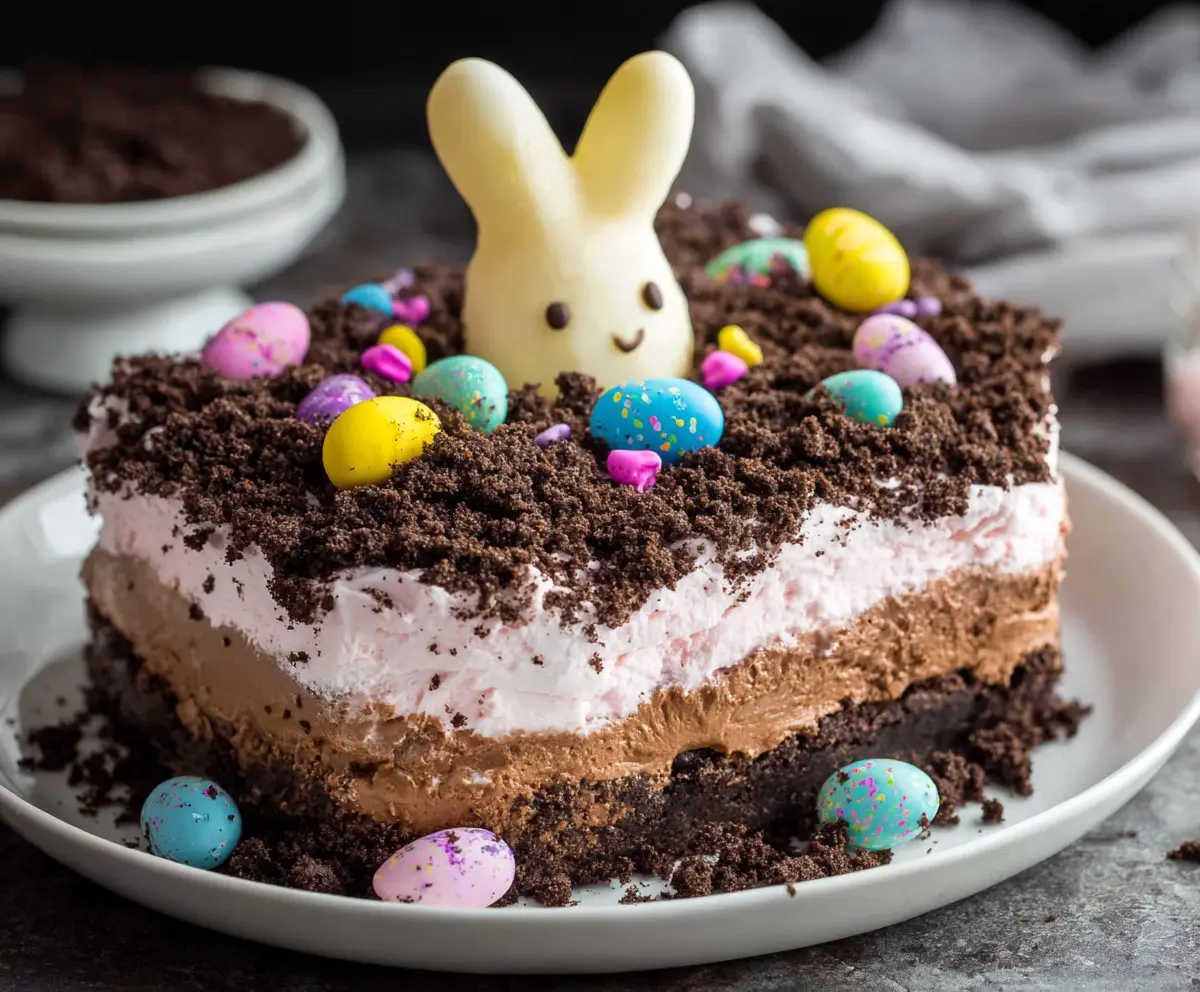
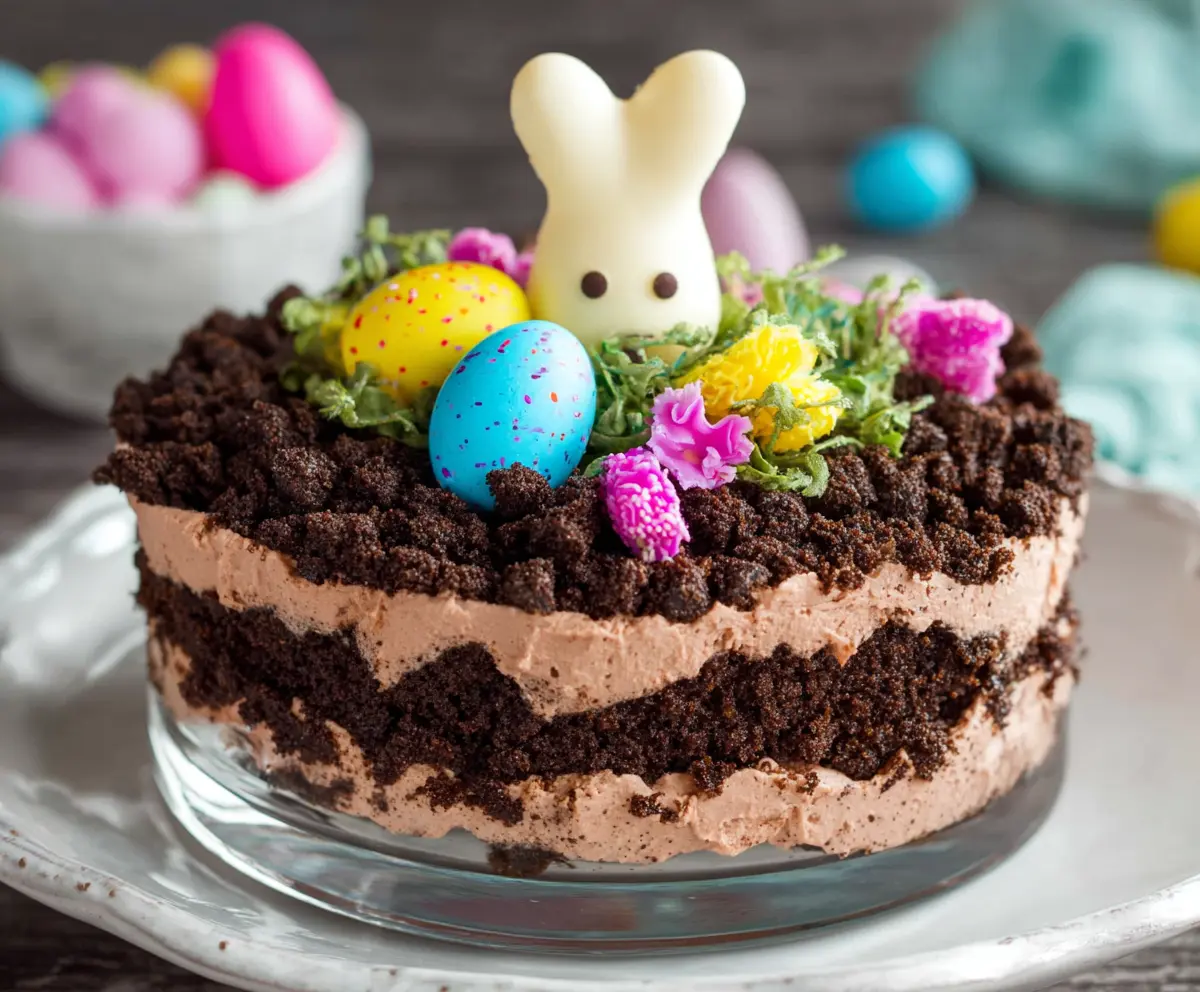
10. Add Dirt Topping:
Sprinkle the reserved crushed Oreo crumbs generously over the pink layer to create your “dirt” topping. This gives it that classic dirt cake appearance!
11. Decorate:
Time for some fun! Place a cute white chocolate bunny right in the center of the cake. Use mini chocolate chips to create adorable eyes and a mouth for the bunny. Finish decorating by scattering the colorful pastel Easter candy eggs across the “dirt” for a festive touch.
12. Chill:
Cover the cake with plastic wrap and refrigerate for at least 3-4 hours or overnight. This will help all the layers set properly.
13. Serve:
Once chilled, slice the cake and serve it cold for a delightful Easter treat that everyone will love!
Enjoy this creamy, chocolatey Easter Dirt Cake that’s both festive and delicious!
Can I Use Different Cookies for the Crust?
Absolutely! While Oreos provide a great chocolate flavor, you can use any chocolate sandwich cookie or even graham crackers for a different taste. Just make sure to crush them finely and mix with melted butter.
How Can I Make This Recipe Gluten-Free?
To make an Easter Dirt Cake that’s gluten-free, use gluten-free chocolate sandwich cookies, like Glutino or Schar. The rest of the ingredients are naturally gluten-free, but always double-check labels to be safe!
What’s the Best Way to Store Leftovers?
Store any leftover Easter Dirt Cake in an airtight container in the refrigerator for up to 3 days. If you want to keep the decorations intact, consider covering the cake gently with plastic wrap instead of a lid.
Can I Skip the Pink Layer?
Of course! The pink layer is optional and mainly for a festive look. You can either omit it entirely or replace it with a different color if you’re feeling creative!