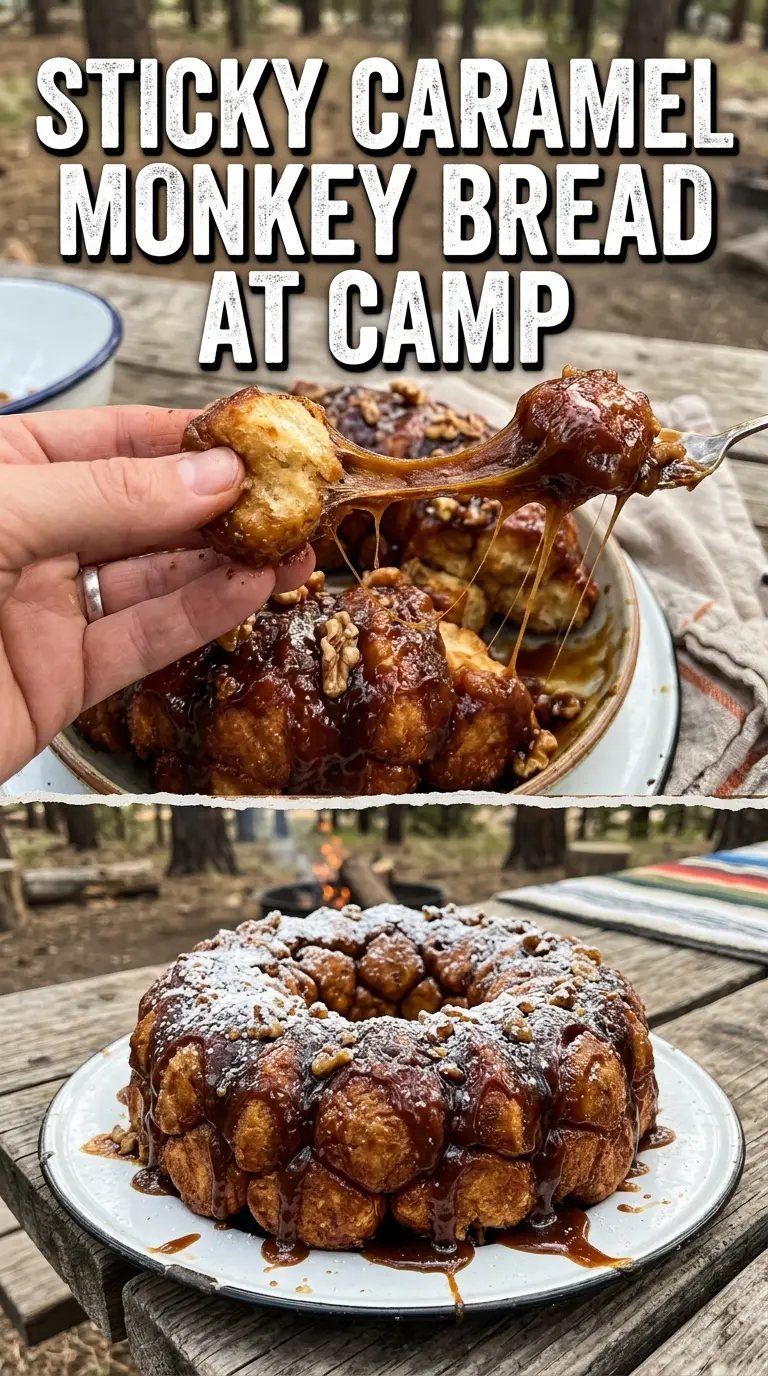
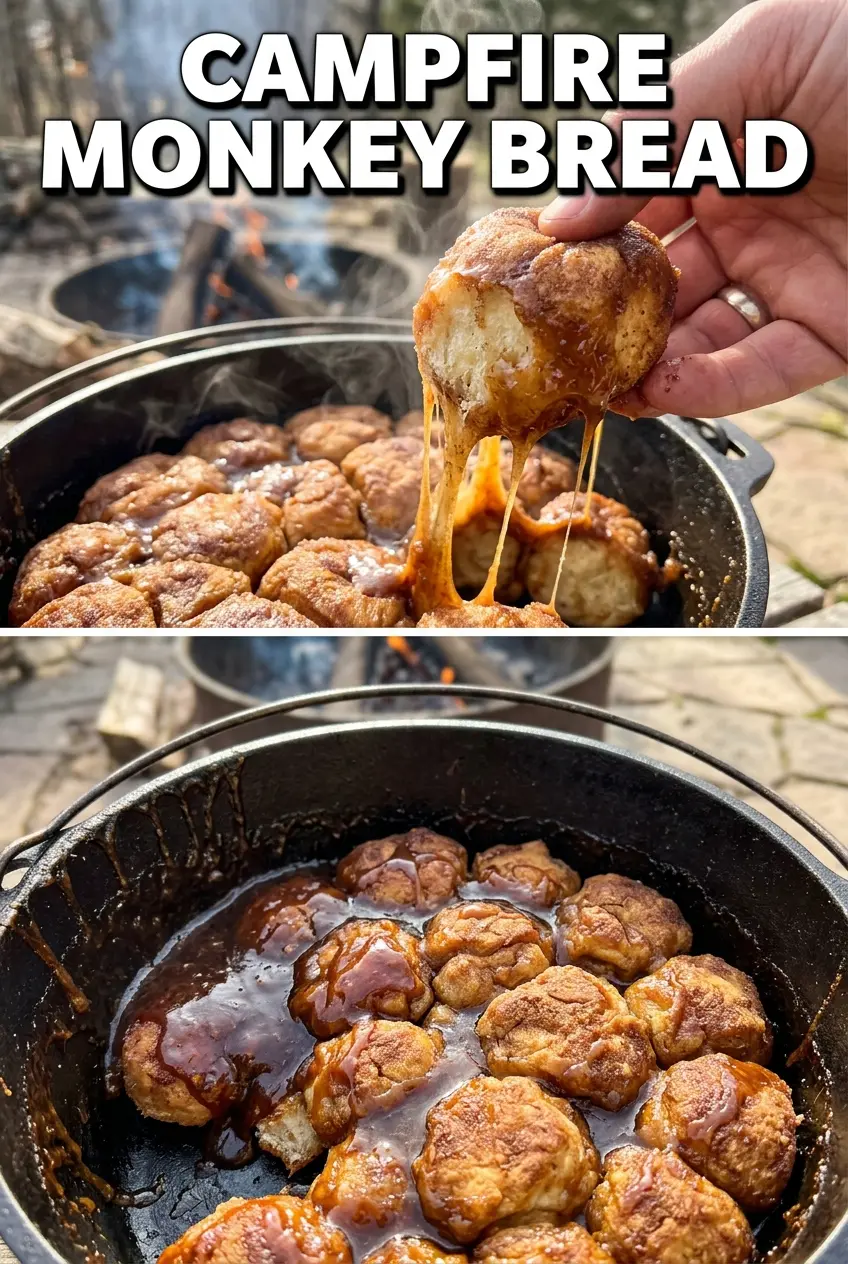
Golden, sticky Campfire Monkey Bread is the kind of dessert people hover around before it even comes out of the Dutch oven. The edges bake up caramelized and crisp while the center stays soft and pull-apart tender, with cinnamon sugar in every bite and a buttery glaze that soaks into the biscuit pieces instead of pooling at the bottom.
What makes this version work is the layering. Coating the biscuit pieces in cinnamon sugar before they go into the Dutch oven gives every piece a dry, spiced surface that bakes into a better crust. Then the melted butter and brown sugar melt together over the top and run down through the bread as it cooks, which is what gives you that glossy, sticky finish without needing a separate sauce.
Below, I’ve included the little details that matter most for campfire baking: how to keep the bottom from scorching, what to look for when it’s done, and a few smart swaps if you want to adjust the flavor or make it work with what you have.
The cinnamon sugar coated every piece evenly and the top turned out golden instead of soggy. Ours pulled apart cleanly after 5 minutes of cooling, and the caramel layer soaked into the bread just right.
Like this campfire monkey bread? Save it for the next time you want a Dutch oven dessert with sticky caramel edges and soft pull-apart centers.
The Part That Stops Campfire Monkey Bread From Burning
The biggest mistake with Dutch oven monkey bread is chasing color too fast. Campfire heat is unpredictable, and if the pot sits directly over hot coals without enough control, the bottom can darken before the center has time to cook through. This recipe works because the biscuit pieces are cut small enough to bake evenly, and the covered Dutch oven traps enough heat to finish the dough without drying it out.
The other thing that matters is the sugar coating. Once the biscuit pieces are tossed in cinnamon sugar, the outside dries slightly and bakes into a better surface. That little bit of coating helps the butter and brown sugar cling to the bread instead of sliding straight to the bottom.
- Quartered biscuit dough — Smaller pieces cook through faster and give you more of those caramelized edges. If you leave them too large, the outside can brown before the centers finish.
- Brown sugar — This is what gives the glaze its deep, sticky finish. Light or dark brown sugar both work; dark brown sugar brings a stronger molasses note.
- Cinnamon — Don’t cut this too far back. The bread needs enough cinnamon to stand up to the butter and sugar once it’s baked.
- Butter — Melt it fully so it mixes with the brown sugar and pours evenly through the layers. If it’s too cool, it clumps and doesn’t coat the bread well.
What Each Ingredient Is Doing in the Dutch Oven
Refrigerated biscuit dough gives you the easiest path to a tender pull-apart dessert. It bakes into soft layers with enough structure to hold the glaze. Homemade dough can work, but it needs a different proofing and bake time, so it won’t behave the same over coals.
Sugar and cinnamon create the crusty sweet shell on each piece. Granulated sugar is the right choice here because it clings well and bakes into a fine, sparkly coating. The cinnamon should be fresh and fragrant; old cinnamon tastes flat once the bread is baked.
Butter and brown sugar form the caramel layer. The butter carries the sugar into the cracks between the biscuit pieces, and the brown sugar melts into a glossy coating as the bread cooks. There isn’t a direct substitute that gives the same sticky finish, but if you need a dairy-free version, use a plant-based baking stick that melts cleanly rather than a soft tub spread.
Cooking spray matters more than it sounds like it should. It keeps the sugar from welding itself to the Dutch oven, which makes inversion much easier and saves the bottom crust from tearing apart when you turn it out.
How to Build the Layers So the Center Bakes Through
Coating the Biscuit Pieces
Cut each biscuit into quarters before anything else. That smaller size is what helps the bread cook evenly in the campfire heat. Toss the pieces in the cinnamon sugar until every surface looks dusty and well covered, then shake off any big clumps. If the coating is patchy, the finished bread will have bland spots and uneven browning.
Loading the Dutch Oven
Spray the Dutch oven generously, then layer in the coated pieces instead of dumping them in all at once. Loose layering gives the heat and glaze room to move between the dough pieces. When you pour the melted butter and brown sugar over the top, aim for even coverage across the surface so it can seep downward as it bakes. If the sugar mixture all lands in one area, you’ll get one sticky corner and a dry side.
Cooking Over Coals
Place coals under the Dutch oven and some on the lid so the top and bottom heat stay balanced. That’s what keeps the center from staying raw while the bottom scorches. Check at 25 minutes, then add a few more minutes only if the top still looks pale and the dough in the center feels soft and uncooked. The finished bread should be deeply golden, set through, and pulling away from the sides in spots.
Turning It Out Cleanly
Let it cool for 5 minutes before inverting. If you turn it out too soon, the glaze runs everywhere and the bread falls apart. If you wait too long, the sugar firms up in the pot and starts sticking. A brief rest gives the caramel a chance to settle so the loaf comes out in one sticky, glorious piece.
How to Adapt This for a Different Crowd or a Different Pantry
Dairy-Free Campfire Monkey Bread
Use a dairy-free baking stick in place of the butter and check that your biscuits are dairy-free too. The coating still bakes up sticky and sweet, though the caramel flavor will be a little less rich than the butter version.
Extra Cinnamon, Deeper Spice
Add a little nutmeg or a pinch of cardamom to the sugar mix if you want the dessert to taste warmer and more spiced. Keep the cinnamon as the main player, or the coating can turn muddy instead of bright and fragrant.
Bigger-Group Dessert
Double the recipe only if your Dutch oven has enough room for the pieces to bake in a fairly loose layer. Packing it too tightly slows the center down and can leave you with doughy spots. For a crowd, it’s better to bake two batches than to overload one pot.
Storage and Reheating
- Refrigerator: Store leftovers in an airtight container for up to 3 days. The sugar coating softens a bit, but the bread still reheats well.
- Freezer: It freezes, but the texture turns softer after thawing. Wrap portions tightly and freeze for up to 1 month if you need to save them.
- Reheating: Warm pieces in a 300°F oven until heated through. The microwave makes the bread gummy and can melt the caramel unevenly, so oven heat keeps the texture closer to fresh.
Answers to the Questions Worth Asking
Campfire Monkey Bread
Ingredients
Equipment
Method
- Cut each refrigerated biscuit dough into quarters so the pieces bake evenly. Keep the pieces about the same size for consistent browning.
- Mix sugar and cinnamon together until evenly combined, then add the biscuit pieces and shake to coat. Stop shaking when every piece looks lightly dusted in cinnamon sugar.
- Spray the Dutch oven with cooking spray to prevent sticking. Make sure the sides and bottom are lightly coated.
- Layer the coated biscuit pieces in the Dutch oven in an even spread. Press them down gently so they sit close together.
- Mix the melted butter and brown sugar, then pour the mixture over the biscuit pieces. Pour slowly so the caramel glaze pools between the layers.
- Cover the Dutch oven and place it on campfire coals with coals on top of the lid. Cook for 25-30 minutes, until golden brown and cooked through.
- Let the monkey bread cool for 5 minutes so the glaze sets slightly. You should be able to invert without it running off immediately.
- Invert onto a plate and pull apart to serve. Let steam escape briefly before separating for cleaner pull-apart pieces.


